# nginx
nginx 基本配置都是在安装目录下的 conf/nginx.conf 文件中。
# mime.types
看下面的默认配置:
http {
    include       mime.types; // 可以单独配置文件
}
MIME-type 和 Content-Type 的关系: 当 web 服务器收到静态的资源文件请求时,依据请求文件的后缀名在服务器的 MIME 配置文件中找到对应的 MIME Type,再根据 MIME Type 设置 HTTP Response 的Content-Type,然后浏览器根据 Content-Type 的值处理文件。
什么是 MIME-TYPE: 为什么这么说呢?首先,我们要了解浏览器是如何处理内容的。在浏览器中显示的内容有 HTML、有 XML、有 GIF、还有 Flash ... 那么,浏览器是如何区分它们,绝定什么内容用什么形式来显示呢?答案是 MIME Type,也就是该资源的媒体类型。
媒体类型通常是通过 HTTP 协议,由 Web 服务器告知浏览器的,更准确地说,是通过 Content-Type 来表示的,例如: Content-Type: text/HTML 表示内容是 text/HTML 类型,也就是超文本文件。为什么是 “text/HTML” 而不是 “HTML/text” 或者别的什么?MIME Type 不是个人指定的,是经过 ietf 组织协商,以 RFC 的形式作为建议的标准发布在网上的,大多数的 Web 服务器和用户代理都会支持这个规范 (顺便说一句,Email 附件的类型也是通过 MIME Type 指定的)。 通常只有一些在互联网上获得广泛应用的格式才会获得一个 MIME Type,如果是某个客户端自己定义的格式,一般只能以 application/x- 开头。 XHTML 正是一个获得广泛应用的格式,因此,在 RFC 3236 中,说明了 XHTML 格式文件的 MIME Type 应该是 application/xHTML+XML。 当然,处理本地的文件,在没有人告诉浏览器某个文件的 MIME Type 的情况下,浏览器也会做一些默认的处理,这可能和你在操作系统中给文件配置的 MIME Type 有关。比如在 Windows 下,打开注册表的“HKEY_LOCAL_MACHINESOFTWAREClassesMIMEDatabaseContent Type”主键,你可以看到所有 MIME Type 的配置信息。
# 多站点的配置
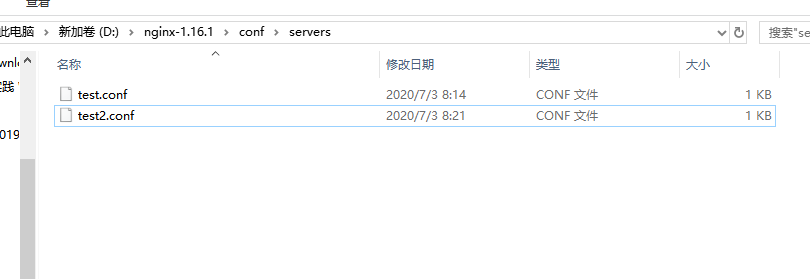
配置站点自然是在 nginx.conf 文件内,但是,不利于维护,所以利用 include 在别处创建一个文件夹,专门收集站点的配置;比如我有两个站点需要配置,在 conf 文件夹下新建一个 servers 由于放置站点的配置;并增加 test.conf 以及 test2.conf,然后在 nginx.conf 文件内,新增配置:他会读取所有 server 文件夹下的 conf 结尾的配置。
http {
    include       mime.types;
    include       servers/*.conf;
}
test.conf 中的内容:
    # 表示要启动一个服务
    server {
        listen       9999; # 服务监听的端口
        server_name  localhost; # 浏览器访问的 host name
    # 要代理的路由
		location / {
      # 匹配到 localhost:9999/ 代理到下面的地址
		  proxy_pass http://localhost:8888;
      proxy_set_header Host $host;
		}
    # 匹配到 localhost:9999/api/ 代理到下面的地址
		location /api/ {
		  proxy_pass http://localhost:8000;
		  proxy_set_header Host $host;
		}
        error_page   500 502 503 504  /50x.html;
        location = /50x.html {
            root   html;
        }
    }
注意这里的 proxy_set_header Host $host; 他的意思是设置 nginx 发送代理请求时候请求的 host 设置为浏览器请求的 host 而不是 nginx 默认设置的 proxy_pass 的 host,比如我们配置的 proxy_pass http://localhost:8888; 如果在服务器端获取 host,是获取到 127.0.0.1:8888,而服务器端想要的是真正的浏览器发送请求的 host,可以设置 proxy_set_header Host $host; $host 是 nginx 中的一个变量,他是每个请求带过来的 host。
# 配置 nginx 缓存
# 配置
在 test.conf 添加下面的配置:
    # 新建缓存配置项
    proxy_cache_path cache levels=1:2 keys_zone=my_cache:10m;
    # 表示要启动一个服务
    server {
        listen       9999; # 服务监听的端口
        server_name  localhost; # 浏览器访问的 host name
    # 要代理的路由
		location / {
      # 匹配到 localhost:9999/ 代理到下面的地址
		  proxy_pass http://localhost:8888;
      # 使用缓存配置
      proxy_cache my_cache;
		}
  }
proxy_cache_path cache levels=1:2 keys_zone=my_cache:10m
首先 proxy_cache_path 是缓存选项的配置,cache 是缓存文件的存放路径(相对路径);levels 是否要创建二级文件夹,因为 cache 可以用在不同的站点缓存,如果都存放在 cache 文件夹中,没有子目录,随着缓存的越来越多,查找缓存的速度也会越来越慢;所以要新建一个二级文件夹。keys_zone 存储大小以及存储的缓存的名字。
# 验证缓存
新建一个 node 服务:
const http = require('http')
const fs = require('fs')
const wait = (second) => {
  return new Promise((resolve, reject) => {
    setTimeout(() => {
      resolve()
    }, second * 1000)
  })
}

http.createServer(function(req, res) {
  if (req.url === '/') {
    const html = fs.readFileSync('test.html', 'utf-8')
    res.writeHead(200, {
      'Content-Type': 'text/html'
    })
    res.end(html)
  }
  if (req.url === '/data') {
    res.writeHead(200, {
      'Cache-Control': 'max-age=20'
    })
    wait(2).then(() => res.end('success'))
  }
}).listen(8888)
我们对 '/data' 接口进行了缓存设置 'Cache-Control': 'max-age=20' ,然后使用 nginx 代理服务代理接口:
    proxy_cache_path cache levels=1:2 keys_zone=my_cache:10m;
    # 表示要启动一个服务
    server {
        listen       9999; # 服务监听的端口
        server_name  localhost; # 浏览器访问的 host name
    # 要代理的路由
		location / {
      proxy_cache my_cache;
      # 匹配到 localhost:9999/ 代理到下面的地址
		  proxy_pass http://localhost:8888;
		}
然后第一次请求时候,会等待两秒显示 success ,如果下次请求,代理服务器已经对数据进行了缓存,直接会显示出来,这时候打开其他浏览器,之前并没有访问过这个地址, success 也会直接出来。说明 代理服务器缓存配置生效了;
# 代理服务器 s-maxage 的配置
可以看到只设置了 max-age=2 为两秒,但是两秒后刷新页面还是请求很快,是因为 s-maxage=20 只有在代理服务器里面才会生效;也就是说浏览器还是会读取 max-age 作为缓存的到期时间。如果在代理服务器中如果同时设置了 max-age 和 s-maxage;他会读取 s-maxage,因为这个 s-maxage 配置项是专门为代理服务器设置的。
const http = require('http')
const fs = require('fs')


const wait = (second) => {
  return new Promise((resolve, reject) => {
    setTimeout(() => {
      resolve()
    }, second * 1000)
  })
}


http.createServer(function(req, res) {
  if (req.url === '/') {
    const html = fs.readFileSync('test.html', 'utf-8')
    res.writeHead(200, {
      'Content-Type': 'text/html'
    })
    res.end(html)
  }
  if (req.url === '/data') {
    res.writeHead(200, {
      'Cache-Control': 'max-age=2; s-maxage=20; private'
    })
    wait(2).then(() => res.end('success'))
  }
}).listen(8888)
# 代理服务器 private 的配置
private:http 请求返回的过程中设置 Cache-Control 为 private,代表发起请求的浏览器可以进行缓存。实际操作中可以会体会到5秒以后,重新进行请求,还是等待两秒显示 success;
const http = require('http')
const fs = require('fs')


const wait = (second) => {
  return new Promise((resolve, reject) => {
    setTimeout(() => {
      resolve()
    }, second * 1000)
  })
}


http.createServer(function(req, res) {
  if (req.url === '/') {
    const html = fs.readFileSync('test.html', 'utf-8')
    res.writeHead(200, {
      'Content-Type': 'text/html'
    })
    res.end(html)
  }
  if (req.url === '/data') {
    res.writeHead(200, {
      'Cache-Control': 'max-age=5; s-maxage=20; private'
    })
    wait(2).then(() => res.end('success'))
  }
}).listen(8888)
# 代理服务器 vary 的配置
vary 是判断如果是一样的头信息,就进行返回缓存的结果。 使用场景:我们使用了服务器端缓存,我们通过 User-Agent 进行返回缓存的数据;如果头信息相同就进行返回缓存结果。或者 Content-language 根据不同的语言返回缓存结果。 下面例子中,如果之前加载过 X-Test-Cache : 1,下次加载的时候会直接读取缓存。 我们就可以限制不仅 url 相同,如果头信息相同才会进行缓存。如果指定的头信息不一样,不使用缓存。
const http = require('http')
const fs = require('fs')
const wait = (second) => {
  return new Promise((resolve, reject) => {
    setTimeout(() => {
      resolve()
    }, second * 1000)
  })
}
http.createServer(function(req, res) {
  if (req.url === '/') {
    const html = fs.readFileSync('test.html', 'utf-8')
    res.writeHead(200, {
      'Content-Type': 'text/html'
    })
    res.end(html)
  }
  if (req.url === '/data') {
    res.writeHead(200, {
      'Cache-Control': 's-maxage=20',
      'Vary': 'X-Test-Cache' // 发送请求的时候只有指定的 X-Test-Cache 是相同的情况下,才会使用缓存
    })
    wait(2).then(() => res.end('success'))
  }
}).listen(8888)
<!DOCTYPE html>
<html lang="en">

<head>
  <meta charset="UTF-8">
  <meta name="viewport" content="width=device-width, initial-scale=1.0">
  <title>Document</title>
</head>

<body>
  <div>this is content
    <span id="data"></span>
    <button id="button">click me</button>
  </div>
</body>
<script>
  var index = 0
  function doRequest() {
    var data = document.getElementById('data')
    data.innerText = ''
    fetch('/data', {
      headers: {
        'X-Test-Cache': index++
      }
    }).then(res => res.text()).then(text => {
      data.innerText = text
    })
  }
  document.getElementById('button').addEventListener('click', function () {
    doRequest()
  })
</script>

</html>
评 论:
← CSP-内容安全策略 HTTPS解析 →